Physical Address
304 North Cardinal St.
Dorchester Center, MA 02124
Physical Address
304 North Cardinal St.
Dorchester Center, MA 02124
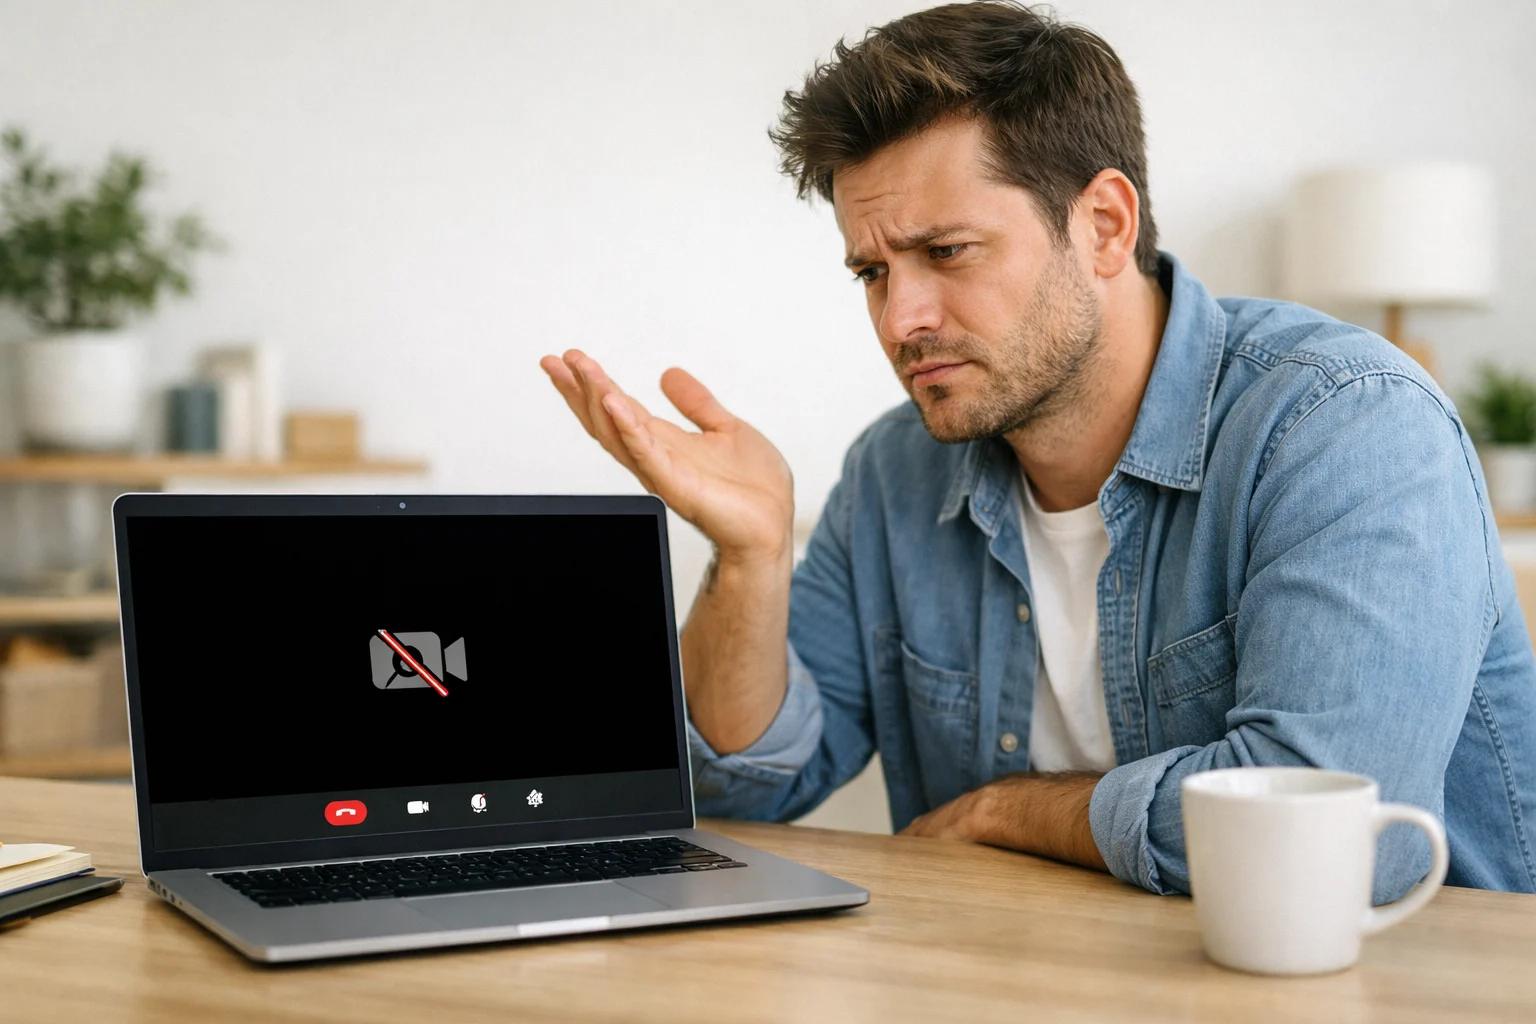
Is your laptop camera not working right when you need it most? You open Zoom or Teams for an important call, and all you see is a black screen or an error saying the camera is not detected. This is one of the most common laptop problems people face today.
A laptop webcam not working can happen on any brand — Dell, HP, Lenovo, ASUS, or MacBook. It affects laptops running Windows 10, Windows 11, and macOS. But here is the reassuring part: the problem is almost always software-related.
That means you can fix your laptop camera yourself without spending money or visiting a repair shop. This beginner-friendly guide gives you 12 proven step-by-step solutions to get your built-in camera working again in minutes.
If your laptop camera is not working, do these three things first:
Still experiencing a laptop camera not working problem? Follow the complete fixes below.

Understanding why your laptop camera is not working helps you choose the right fix faster. Here are the most common causes:
In 9 out of 10 cases, a camera not working on laptop issue is caused by settings, drivers, or app conflicts — all of which are easy to fix.
Before diving into settings, rule out the simplest cause of a laptop camera not working.
Many HP, Lenovo, and Dell laptops now include tiny privacy shutters that are easy to miss.
A quick restart clears temporary glitches that cause your webcam not working properly.
Restarting releases the camera from any app that was holding onto it and refreshes system processes.
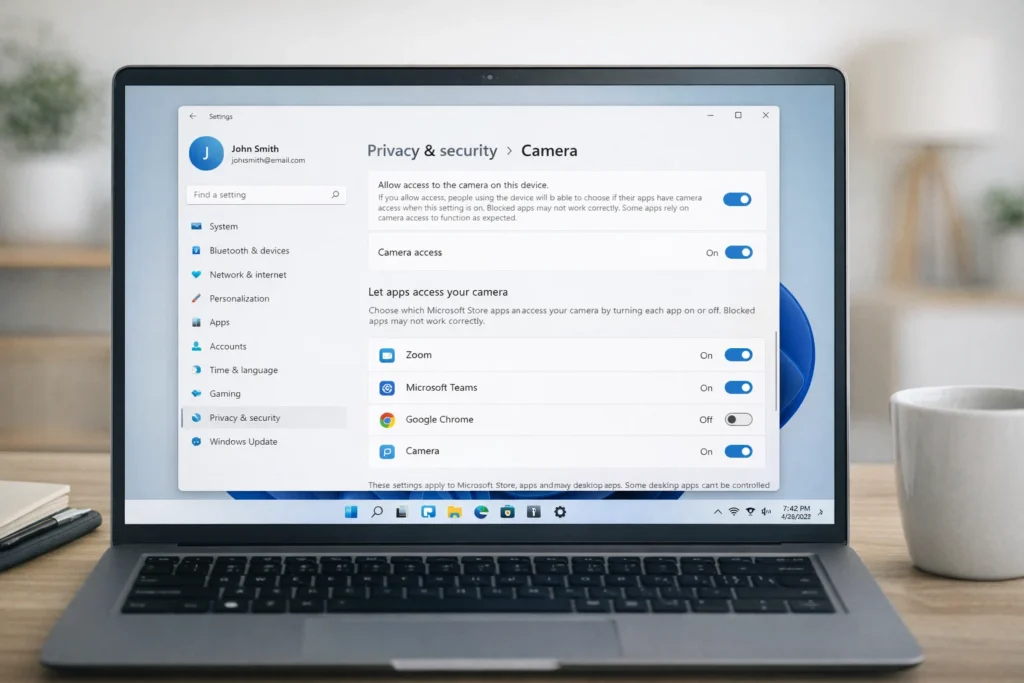
Privacy settings are the number one reason a laptop camera is not working on Windows 10 and Windows 11.
If your webcam is not working on Windows 11 or Windows 10, this fix alone solves the problem in most cases.
If your laptop camera is not working on a MacBook, macOS may be blocking access.
Your laptop webcam can only be used by one application at a time. If another app has control of it, you will see a black screen or an error.
This is a common cause of the laptop camera black screen problem.
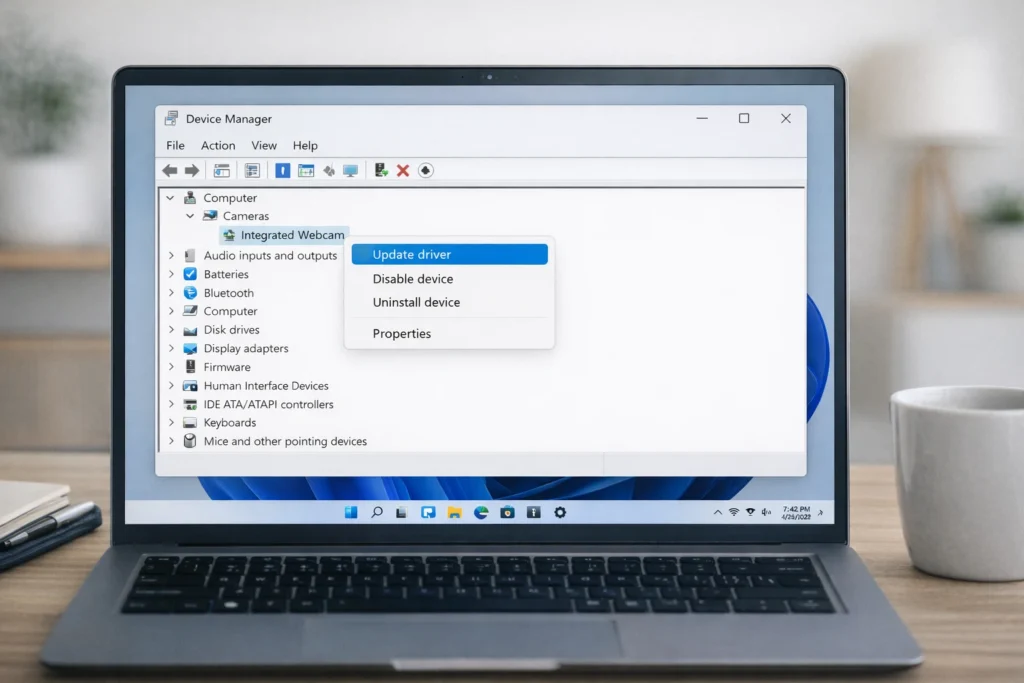
An outdated or corrupted driver is a leading reason your laptop camera stopped working, especially after a Windows update.
If no update is found, visit your laptop manufacturer’s website and download the latest webcam driver manually. This is one of the most reliable ways to fix a laptop camera that is not working.
If your camera stopped working on laptop right after an update, the new driver may be the problem.
When updating and rolling back do not fix your laptop camera not working, a clean reinstall often does.
Windows will automatically detect and reinstall the correct camera driver on restart.
Windows includes a built-in tool specifically designed to diagnose a webcam not working on your laptop.
This tool automatically scans for known camera problems and applies fixes.
Some antivirus programs block the built-in camera as a security feature, causing your laptop camera not working issue.
In rare cases, the laptop camera is not detected because it has been disabled at the hardware level in BIOS.
Before assuming your hardware is broken, confirm the problem by testing in a different application.
This test helps you pinpoint exactly why your camera is not working on your laptop.
🔧 Quick Laptop Camera Troubleshooting Checklist:
- Always restart your laptop before trying advanced fixes
- Test the webcam in the default Camera app first
- Check for a keyboard shortcut to enable the laptop camera (often Fn + F8 or a key with a camera icon)
- Make sure your operating system is fully updated
- If using Google Meet or another web app, try a different browser
- If using an external webcam, try a different USB port
- Check if the camera light turns on — if it does, the hardware works
Prevent your laptop camera from not working in the future with these habits:
A laptop camera black screen usually means another app is using the camera, the privacy shutter is closed, or camera permissions are turned off. Close all video apps, check for a physical cover, and verify your settings under Settings > Privacy > Camera.
To enable your laptop camera on Windows 11, go to Settings > Privacy & Security > Camera. Toggle “Camera access” on. Also make sure individual apps have permission. If the webcam is not working on Windows 11 after this, update the driver through Device Manager.
Windows updates sometimes reset privacy settings or install incompatible camera drivers. This is one of the most common reasons a laptop camera stops working. Check your camera permissions first, then try rolling back the webcam driver in Device Manager.
Test the camera in the built-in Camera app. Try every software fix in this guide. If your laptop camera is not working in any app after all fixes, connect an external USB webcam. If the external webcam works fine, your built-in camera likely has a hardware issue and may need professional repair.
Yes. If your laptop camera is not working and you need an immediate alternative, you can use your phone. Continuity Camera works with Mac and iPhone. Phone Link connects Windows to Android. Third-party apps like DroidCam also let you use your phone camera as a laptop webcam over Wi-Fi or USB.
A laptop camera not working is almost always a software issue you can solve in minutes. Start with the basics: check for a physical camera cover, restart your laptop, and verify your privacy settings. If those steps do not resolve it, move on to updating, rolling back, or reinstalling your webcam driver.
The 12 fixes in this guide cover every common cause of a webcam not working on both Windows and Mac. Work through them in order — most users find their laptop camera fix within the first five steps.
Bookmark this page so you have it ready the next time your laptop camera is not working. And if all software fixes fail, an affordable external USB webcam is a reliable backup while you arrange a hardware repair.